#129 - Medical Kit Building
First off – Passed my last amateur radio exam the Extra. 50/50 😊 Yay! Got that out of the way.
And my Nevada CCW permit is finally in my hands 😊.
Now – the main event.
This week, what I am writing about is how I built my medical kit bags.
When I first started this exercise a few months ago, I knew I was completely out of my depth. The medical kit bags that one could find online, and the research that I did, had all of these items. And I knew what almost none of them were for.
The medical kit Christmas tree - The clear pouch on top is for our hiker
The WFR course certainly rectified that particular issue. After the course was finished, I went back through my spreadsheets and lists of what I’ve been looking at and was just amazed at how easy it was to analyze what I needed, what I didn’t, and how to put it all together.
So, I have done so. And I will lay out what I did in this particular blog posting.
I definitely welcome any feedback from my companions at the WFR course. I’ve also included downloads of the spreadsheet that I used to create my kits.
I built five kits in total. Two large kits, which would basically be at the house (1 in the U.S. and the other eventually in Asia), or possibly on a long road trip in a vehicle. In addition, I built a more streamlined kit that I put into a backpack format to carry in my vehicle with me when I’m on the road or going to the range. And two small kits – one for Liza for her extended hikes and last a miniature kit just for me when I’m out on walks and stuff.
I constructed these from the standpoint of running across a random accident in an urban environment, or experiencing some kind of a gunshot, if I’m at a shooting range. Also - These are really for VEHICLE carry. So please keep that in mind when you look at the list. For an extended wilderness scenario of course it would need to be changed but it is still a good starting point.
I sourced these bags from a place called gearbags.com and I bought one ‘fill kit ‘for one of the large bags and then I split it between the two large bags that I bought. I then bought ancillary items from NOLS and Amazon in order to fill out my list completely across all three kits.
https://gearbags.com/product-category/stocked-kits/first-responder-kits/
NOLS actually has really good deals on Tegaderm, 2nd Skin and things like triangle bandages. And I think as a WFR there is a discount.
So I will lay the bags out out with pictures and show kind of I had in each one. The captions will explain each of the photos. The details are in the spreadsheet at the bottom.
Disclaimer: I don’t claim these to be the ultimate medical bags. I consider them a starting point. And I will learn as I go.
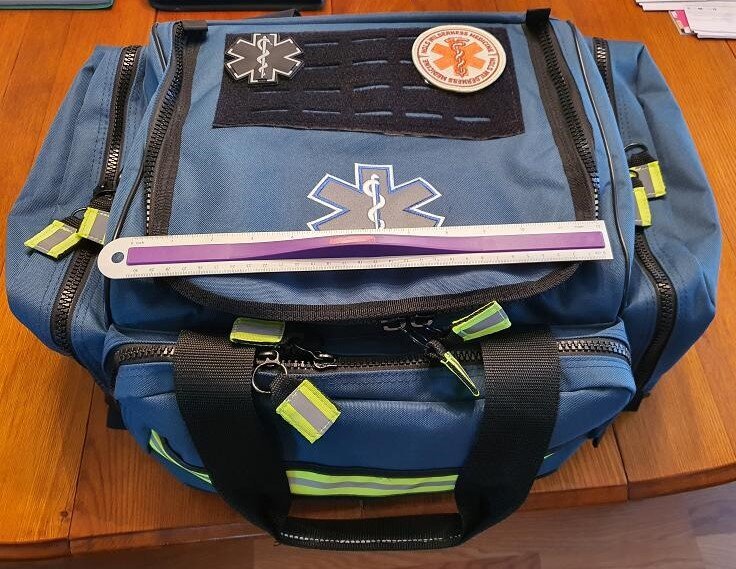
Also - The WFR Patch - Ordered from NOLS and then glued VELCRO to the back. :-)
I ordered one (1) LXMB35-SKF - This was the Fill Kit for one (1) LXMB-35. But these are for EMTs … So I split the fill kit between the two large bags and bought extra individual items from Amazon and NOLS to fill it out properly.
Total budget?
GEAR BAGS - 2 @ LXMB35 + Fill Kit + LXPB-89 - $410 (they did give me a 10% discount because I helped them a little on some logistical issues with their item list.
Amazon + NOLS - $400 Approximately - So total ~$800 - $850 But look at the spreadsheet below for what that includes. And that is 3 large kits + 1 small one.
This was the main bag - LXMB-35 - Really a solid bag
A look at the inside of the big bags
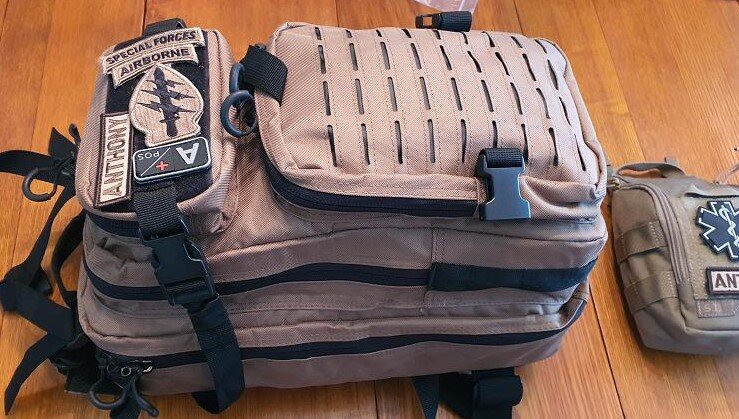
This is the LXPB-89 - What I plan for regular vehicle carry - Yeah, yeah, I went a little overboard on the patches :-)
This is a divider section that fits inside the main compartment. I use that for the Digital BP, extra ACE bandages, notebooks, etc.
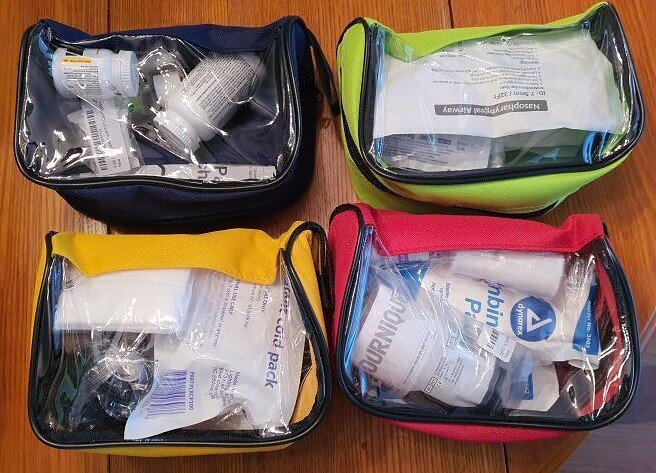
Red - Wounds ; Yellow - Bumps & Bruises ; Blue - Medicine ; Green - Airway stuff - Used same bags for all three kits with same contents (See Spreadsheet) - These come with the LXMB-35. I bought one extra set for my backpack.
LXMB-35 - Front compartment - The colored items are a Berman kit - I ended up putting the Berman kit into the GREEN bag along with other Airway stuff.
Side Compartment - Gloves, Masks, Alcohol swabs etc. - Stuff you need all the time - The large 12”x 30”pad I ended up putting in the main compartment.
Other side compartment - CPR Kit
Bought these for easy small packs of medicine - Hygiene
Bought 20 of these strips of 3 - Put 4 strips into each kit
Got a couple of these for each kit
Can’t have too many Ace bandages
NOLS - Steri-Strips, TegaDerm, 2nd Skin - Very well priced I thought
Very reasonably priced stethoscopes ($20) - Seem to work very well - Amazon
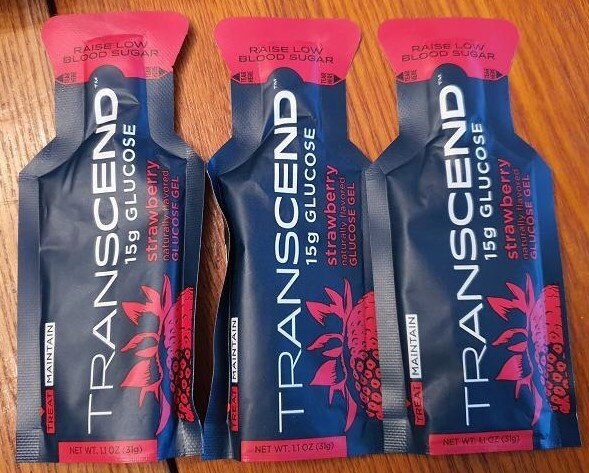
For people with low blood sugar - Super Expensive - Carry candy bars instead :-)
Wound Irrigation Syringes
Same color bags in the small backpack for vehicle - The RED and BLUE are in the other main compartment
Small IFAK bag from 5.11 - Doubtful if I would buy again. Really small - Only for individual use - Originally designed for combat use and good for that … but for general use and daily individual carry …? Not that great IMHO
The Excel Spreadsheet I used to keep track of kit components - Click to download if you want a copy.
Some things I learnt:
1. These things called ‘Trauma Kits’ that come in a ‘tacti-cool’ plastic pouch? Don’t waste your money. Buy the individual components.
2. NOLS is a good source for some items on the list, especially Steri-Strips, Tegaderm and 2nd Skin.
3. Amazon is still a great ‘GO TO’ for most items … especially the sets of trauma shears and hemostats. I put the link down below. - It comes with 2 shears, hemostat, and pen light for $11 - You can’t buy the individual items for anywhere close to that.
https://www.amazon.com/gp/product/B0741DSBRW/ref=ppx_yo_dt_b_asin_title_o00_s00?ie=UTF8&psc=1
4. I put instruction guides into the clear pouches in the main flaps for each kit
I really welcome contact and comments about this. Sorry for rushed job on this post. Recovering from yet another back injury and wanted to get it out before I procrastinated. :-)


